
Car AC Takes A While To Get Cold? [Here’s Why & What To Do!]
When a vehicle’s air conditioning system malfunctions, it doesn’t take long to notice. On average, it takes between five to ten minutes for the unit to cool a car’s cabin, so if it’s taking significantly longer, it’s likely that there’s a problem.
Your car’s AC may take a while to get cold when outdoor temperatures are higher than 95 degrees Fahrenheit (35°C), which causes the compressor to work harder. Alternatively, a dirty cabin air filter, low refrigerant, or faulty air compressor could cause slower cooling.
In this article, we’ll examine four potential reasons your car’s AC is taking longer to cool the vehicle, as well as how to fix each problem. Read on to learn more.
1. Sweltering Outdoor Temperatures
A car’s air conditioning unit works using a compressor, refrigerant, condenser, and fans. The refrigerant starts in a gaseous state, which is pressurized by the compressor. From there, the refrigerant is pumped to the condenser, where air is absorbed and releases heat outside the vehicle. At the same time, the gaseous refrigerant is converted into a liquid. As it changes state, the refrigerant helps create cool, dry air, which the fan blows into the car’s interior.
When temperatures outside reach 95 degrees Fahrenheit (35°C), most vehicles’ air conditioning systems run at maximum capacity. Once temperatures reach or exceed 100 degrees Fahrenheit (37.8°C), the system operates over capacity and may malfunction or fail.
Therefore, when operating your car’s air conditioner during extreme temperatures, you should expect the system to take a while longer to cool the vehicle down. This is because the refrigerant is already at a higher temperature, so the condenser has to work harder to release heat, increasing the time it takes to cool the vehicle.
How To Fix
In most cases, this isn’t much of a problem; you simply need to wait a little longer for the air compressor to work to cool down the cabin. You can, however, increase the efficiency of the air compressor by keeping your vehicle cooler. Do this by parking in shady areas, such as a garage, under a canopy of trees, or by investing in a car cover.
I recommend the Kayme 6 Layers Car Cover, available on Amazon. This car cover, made for sedans, features six layers of durable material. It’s waterproof and provides wind resistance and UV protection. The reflective aluminum layer keeps the vehicle cool in hot temperatures, and the lower cotton layer protects the car’s paint.
If you live in an area that experiences regular extreme temperatures, try limiting your trips to the coolest parts of the day, around an hour after sunrise. Whenever possible, avoid going out between 3 p.m. and sunset when the heat is at its highest point.
2. Dirty Cabin Air Filter
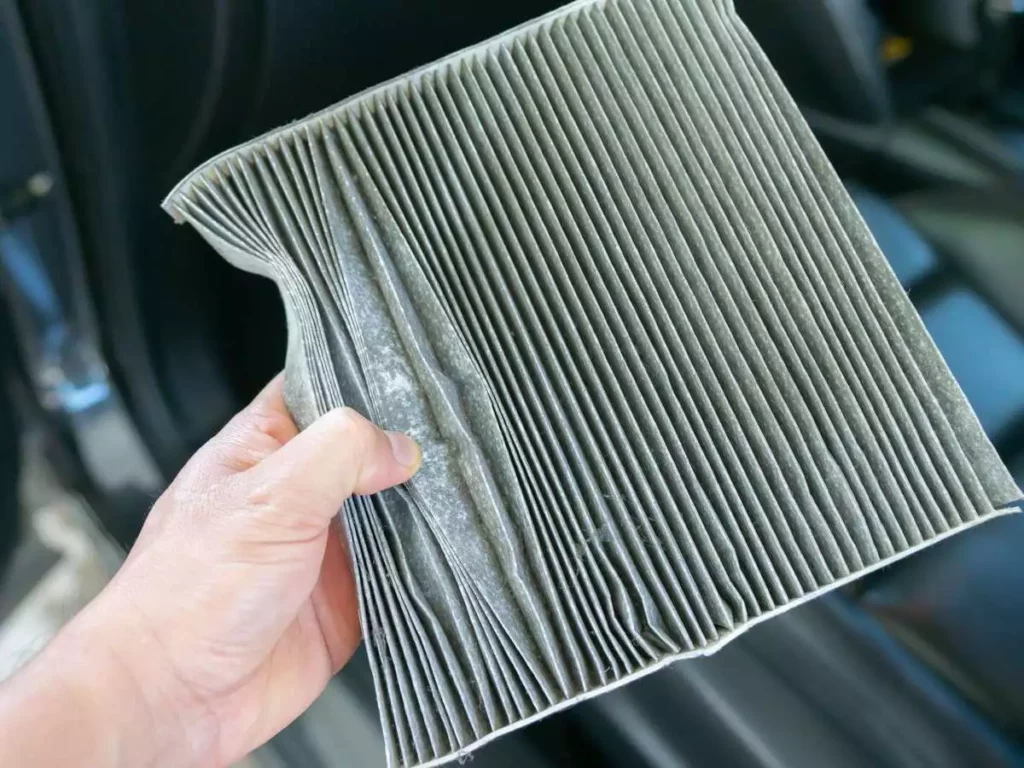
The cabin air filter prevents dust, dirt, debris, and other contaminants from entering the vehicle’s interior. When this filter becomes clogged, it reduces or completely blocks airflow, reducing the amount of cool air entering the car. This can lead to poor cooling and may even adversely affect the air quality in your vehicle.
Some signs of a dirty cabin air filter include:
- Foul, musty odors
- Dust, debris, or hair entering the cabin as the fan blows
- Odd noises from the fans
If you notice any of these signs, along with the air conditioner taking longer than usual to cool the cabin, it could be a dirty cabin air filter to blame.
How To Fix
A clogged cabin air filter is a relatively easy fix; you just have to replace the cabin air filter. I’ll walk you through a general tutorial, but keep in mind that all cars are different. As such, instructions for your vehicle may slightly differ. Check your car’s manual to determine precisely how to change your air filter.
- Take down the glove compartment. Cabin air filters are usually located behind the glove box. Open the glove box and look at the outside edge. Remove and set aside any screws (usually one) from the edge of the glove box. Remove the pin from the arm of the glove box (it might be a removable band instead of a pin). Gently squeeze both sides of the glove box and slowly lower it (do not pull) to reveal the air filter access compartment.
- Access your air filter. Observe the sides of the air filter compartment to locate two tabs. These tabs remove the face of the compartment where the air filter is located. Squeeze these two tabs inward to remove the cover. Once removed, slowly remove the old filter to prevent disturbing the old dust and debris (or else you’ll make a mess).
- Clean the compartment. Use a vacuum cleaner or duct brush to clean out the filter housing. If desired, you can wipe it out using a damp cloth. Just allow it to dry before inserting the new filter.
- Install the new filter. Observe the new filter to ensure you’re placing the filter in the correct position (the airflow arrow should face into the cabin). Once it’s facing the right way, slide it in and make sure it’s securely seated. Replace the cover and snap it back into place.
- Replace the glove box. Slowly raise the glove box back into position. If it has a pin, slide it back where it belongs. If it has a band, slide the band back in place. Replace the screw and close the glove box.
3. Air Conditioner Needs Recharged
Air conditioner systems are sealed, meaning that the coolant cycles through the system with nowhere else to go. Regular wear and tear may cause a vehicle’s air conditioner system to develop very minor slow leaks in the hose or other parts of the system. In most cases, this isn’t a cause for concern; in fact, these tiny leaks are hardly noticed unless the air conditioner stops efficiently cooling (which is caused by a reduction in refrigerant levels).
Unless you live in an area with regular sweltering temperatures, and run your air conditioner almost daily, it’s unlikely that you’ll need to recharge your air conditioner more than once every three or four years. Over time, every car is going to need refrigerant added to its A/C system. Fortunately, this is a fix you can do at home.
How To Fix
All you need to top off your car’s air conditioning system is a recharge kit. As of 2021, the United States Environmental Protection Agency requires that all vehicles use R-1234YF refrigerant.
When doing any work on your vehicle, especially when working with refrigerants, wear eye protection and gloves. Read and follow all instructions and warning labels on the recharge kit and refrigerant before proceeding with recharging the system. Finally, read the information on the label under your hood to determine how much refrigerant to use.
- Start your car. Turn on the air conditioner and set it to its coldest temperature and highest fan setting.
- Check that the A/C compressor is properly functioning. Ensure the compressor clutch isn’t stuck; the pulleys should rotate. If not, stop here and move on to the “Air Compressor Malfunction” section of this article. Otherwise, move on to step three.
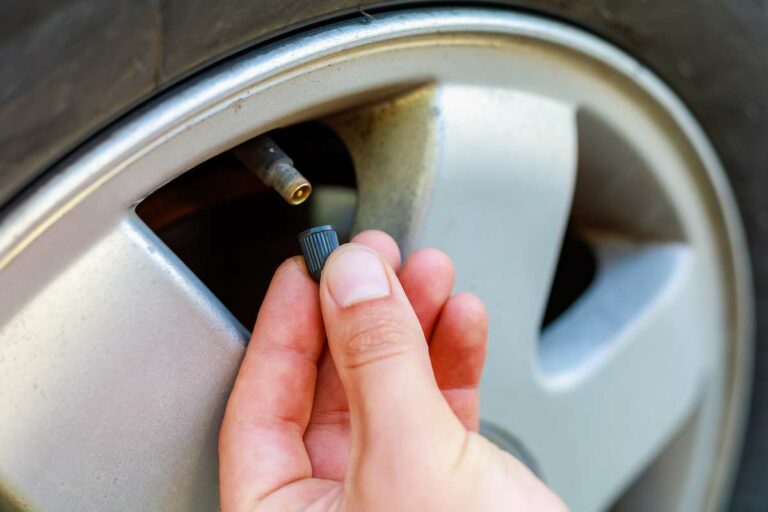
- Test the air conditioner’s pressure. Turn off the ignition and locate the pressure port under the hood. It’s a small valve with a black or gray plastic cap labeled with the letter “L” found on the passenger side of the engine.
- Attach the recharge hose. Locate and connect the recharge hose to the low pressure port. Press down so that the hose securely attaches to the port and snaps into place. Do not engage the trigger on the refrigerant at this time!
- Restart the vehicle. Observe the pressure gauge as the compressor works. If the pressure per square inch (psi) sits below 40, continue on to the next step. If the psi is above 40, stop here — this means the system is overcharged or the compressor is malfunctioning.
- Connect the refrigerant to the recharge hose. While the hose is attached to the low pressure port, hold the can upright (do not tilt or hold the can horizontally) and hold the trigger down for five to ten seconds. Release the trigger and observe the pressure. Once the pressure is as close to 40 psi as possible, stop adding refrigerant.
At this point, the vehicle should noticeably blow cooler air. If desired, you can check the temperature using a thermometer. Fully charged car air conditioners blow an average temperature of 28 degrees Fahrenheit (-2.22°C) directly at the vents.
Here’s a video on how to recharge a vehicle’s A/C system:
4. Air Compressor Malfunction
Without an air compressor, the air conditioner wouldn’t work at all. Therefore, if something goes wrong, you’ll have no cold air. The air compressor is what keeps refrigerant moving throughout the system and ensures that everything runs smoothly and efficiently. A faulty compressor not only prevents the A/C from running optimally, but it can also lead to additional malfunctions which can cause the need for additional repairs.
Some symptoms of a failing compressor include:
- Weird noises (squeaky, knocking, grinding, etc.) when using the air conditioner
- Car only cools while driving (and begins to warm when idling)
- Fluid leaking from compressor (if bearings are broken or worn)
How To Fix
Unfortunately, once an air conditioner compressor fails, it’s not something you can repair. The compressor is the heart of an A/C system and fixing it isn’t worth the time, cost, or effort. Instead, you’ll have to replace the compressor entirely.
If you’re highly experienced with car repairs, you can replace a compressor at home in your garage. If you’re doing the job yourself, you’ll only need to buy the parts, assuming you have the tools you need. You can usually find refurbished parts at a much cheaper price than you’d pay at an automotive repair shop.
On the other hand, if you’ve never done these jobs before, you should leave it to the automotive technicians — but it’s a costly repair. On average, you’re looking at around $200 for labor and up to $850 for parts. If the car is still under warranty, you can usually get a fully covered replacement. With that said, it’s improbable for an air compressor to go out during the warranty coverage period.
![Car Won’t Start or Make Noise? [Here’s What to Do!]](https://vehicleuniversity.com/wp-content/uploads/2023/01/cropped-view-of-african-american-businessman-in-su-2021-09-01-14-45-07-utc-768x576.webp)
![Do Cars Have Trackers? [Everything You Should Know!]](https://vehicleuniversity.com/wp-content/uploads/2023/01/gps-system-in-a-smart-car-2022-12-15-23-13-58-utc-768x512.jpeg)


![Car AC Compressor Running But Not Cooling? [Here’s Why!]](https://vehicleuniversity.com/wp-content/uploads/2023/01/woman-turning-on-car-air-condition-system-on-dashb-2022-02-18-21-32-10-utc-768x512.webp)